Categories
alexa

Placedreamer – a more interesting application

The problem with most Alexa apps is that they’re simple text bots with voice UIs.

Obviously, Alexa’s clever hacks make her skills a little more interesting than the same thing on the command line; such as the system used to match thousands of different phrases to a user’s intention. But a lot of the skills available are boring – particularly the ‘facts’ type of skill, where Alexa recites a random piece of information. What would be interesting would be an application that would not work outside of an Alexa device.

A more interesting problem

Take as an example the tarot app I built in my recent tutorial. It doesn’t do anything particularly novel – we could do the same with a twitter bot or a Bash script. As well as speech, Alexa provides the ability to play sounds, as well as some clever ways of handling streaming (something Tim O’Reilly praised in his celebration of Alexa). An interesting skill would make use of such things.

Rather than take the tarot skill further, I wanted to work on something more interesting. I asked friends on Facebook what they thought I should do. Tom suggested “Pipe in birdsong from the last distant place you travelled to. City sounds from another timezone.

This sounded like a great idea. I like the idea of Alexa as a device that can occupy a strange, eidetic space – something to talk to when you can’t sleep. There are online field recordings available, and I’ve got photos which can be added to the response cards. This is a somewhat whimsical application, but that’s what attracted me to Alexa in the first place – a device that is placed in intimate, home spaces, and is always listening into conversations. (Although this is only for her name/wake-word, it can still prove disconcerting)

A problem with invocation names

My previous skill had the invocation name ‘tarot’. Which was OK for testing, but won’t pass Amazon’s requirements for invocation names, which states that “One-word invocation names are not allowed”.

Following this rule, I first set up the invocation name for this skill to be ‘Place dreamer’. Actually summoning this skill proved difficult. Place was too easily confused with Play, which Alexa saw as a more likely word, and would hear “Place Dreamer” as “Play Streamer”.

Don’t Believe the Hype

VUIs have a huge potential for providing certain types of information. I like asking Alexa if it’s going to rain – it saves me having to grab my phone to look at the weather forecast while trying to leave the house. I can also see how great a VUI will be when I’m driving – I hate setting off in my car and realising I’ve misconfigured my satnav. But one of the big problems I’m having with VUIs is being told how this is the next big thing.

I’m personally not interested in bots for most applications. I find it hard to trust that constrained conversational pathways will be better than tools like google. One book I’m reading about bots sounds the same as late-nineties books on the topic. Just because technologies have improved does not by itself mean this is definitely the era of VUIs and chatbots. Either the application needs to be appropriate or the interface very well crafted.

Categories
brightonjava

June’s Brighton Java – Alexa and CQRS

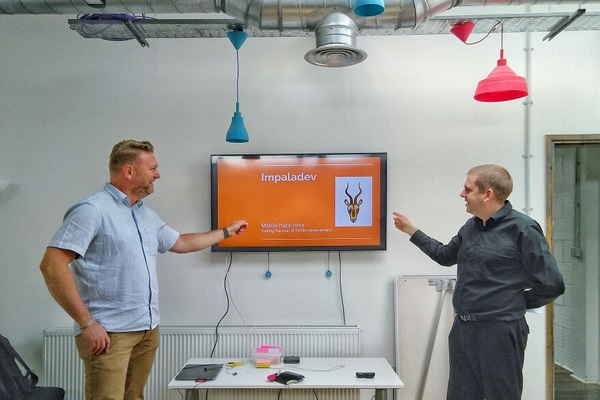
We had two speakers at Brighton Java this week. I was the support act, kicking off with an introductory talk on Alexa in Ten Minutes. I enjoyed putting together such a brisk technical presentation, which came to 34 slides. I managed to finish dead on time and had some interesting questions afterwards. The slides are online,  along with a video of the evening. I also took my Echo Dot along, so that Alexa could speak with me:

Some links from the talk:

The second presentation, from David Ellis, was about CQRS and event sourcing. It was very timely for me as I’m reviewing the design of a platform I’m working on.

CQRS stands for Command/Query Responsibility Separation and is the idea of using a different data model for reads and writes. One way of doing this is event sourcing, which records a system’s full history as a series of immutable events. These become an append-only system of record for the system (as well as a full audit). Representations of state can then be built from this (including in-memory where speed is needed). You can also produce representations of specific times – a form of time travel. David ran through the basics and showed how event-sourcing worked as a means for CQRS.

While I’ve read about CQRS and event sourcing before, it’s great to hear someone talking about it. It also amused me that David’s examples were “written in Scala so that they fit on the slides”.

Given that the talk was at Brandwatch, there was some good discussion afterwards about the possibility of using Kafka. I’ve also been wondering today about combining CQRS and REST and hope to research that next week.

So, all-in-all, a good evening. My talk seemed to go well, and I learnt about CQRS. Thanks, once again, to Brandwatch, who hosted the event, as well as providing drinks and pizza. Luke and Adina helped set up the night, with Luke doing an amazing job with the tech side of things, handling sound, streaming and technical gremlins.

Categories
alexa

First Steps with Alexa

Amazon’s Alexa is a virtual assistant available on the Amazon Echo, as well as (with a little struggle) on the Raspberry Pi. I find voice interfaces fascinating – they’re a staple of sci-fi, and the natural way people communicate with one another. Email and IM are great, but look at how often people switch from these to picking up the phone for a discussion. Voice works.

One of the great things about Alexa is how easy it is to build a skill (as new Alexa abilities are called). There’s an Amazon tutorial that explains how to get a skill up and running in five minutes.  There are also lots of useful blog posts on the subject, of which this is another. It will be the first in a series of posts. This initial version simply returns a randomised String to demonstrate how easy it is to get Alexa to work.

All the code here is in a git repository. I’m going to draw attention to specific parts of the code, but not repeat the entire contents of the repo.

Pre-requisites

Working through this tutorial requires a basic Java development environment (with gradle and git) and an Amazon account with AWS and Amazon Developer access.

The Basic Application

At their simplest level, Alexa skills receive a String and return a String. Amazon handles the parsing of the voice, and even does some neat things to contextualise what it has heard – for example, adding metadata about dates and times in the request. The skill simply needs to use this input to generate a response (sometimes marked up with Speech Synthesis Markup Language metadata).

The application I’m working on is a simple Tarot card reader. I became interested in tarot through the Hexen deck, which I saw at the V&A’s recent You Say You Want a Revolution exhibition. The cards are based on the history of the Internet and counter-culture:

I don’t believe in the tarot as a fortune-telling method, but I’m interested in it as, in Italo Calvino’s phrase, “a machine for telling stories”. And I like the idea of having a piece of technology like Alexa reading and interpreting the cards. I mean, that’s science fiction, right?

Building the Basic Code

The first tag in the repository is for a simple Java class returning a string. There is no Alexa code at this point – when this is added in the next step, it is simply as an interface for this simple code. We could as easily hook up the basic class to a twitter bot, or a web-server, or even an email auto-responder. The core code does not depend upon Alexa. To have a look at the basic code, clone the repository and then checkout the initial commit:

git clone git@github.com:orbific/alexa-tarot-skill.git
cd alexa-tarot-skill
git checkout basic-tarot-class

The first version of the TarotCardPicker creates a deck of 78 cards, then selects a random one. At this points we’re ignoring things like reversed cards and interpretations in favour of simplicity. We’re also ignoring lots of things like internationalisation, unit tests and javadoc which would be expected if this were to be used as production code.

It’s possible to compile and run this piece of code.

gradle build
java -jar build/libs/alexa-tarot-skill-1.0.jar

Running the two commands above from the project’s root directory results in a line of text stating the name of the card that has been picked. The next stage is to make this code available via Alexa.

Adding the Alexa/Lambda files

The easiest way to get going with a skill is to use Amazon Web Services (AWS) to host the code. The specific part of AWS that is used for Alexa is AWS Lambda. This is a serverless code environment and basically means a piece of code can run without having to worry about infrastructure. You don’t need to use Lambda, but it makes life a lot easier – running Alexa skills from web services means having to deal with certificates between Alexa and another environment.

To see the basic framework code, use the appropriate checkout:

git checkout basic-alexa-framework

There are five files needed to wrap Alexa around the simple Tarot code:

  1. SampleUtterances.txt – the next file lists all the different ways a user might contact the service. These are grouped into ‘intents’. If you wanted to ask for a coffee you might say “Please give me a coffee”, “I’d like a coffee” or “I demand coffee”, all of which have the same Intent. This file maps statements to intents.
  2. IntentSchema.json this describes the intents the skill expects to receive. We can also use in-built intents, which allow different apps to have similar functionality. For example, I might ask Alexa to tell me how the Tarot card functionality behaves, which would trigger a HELP intent.
  3. TarotSpeechletRequestStreamHandler.java this class is a subclass of SpeechletRequestStreamHandler. The documentation explains “This class provides the handler required when hosting the service as an AWS Lambda function” – it’s a link between AWS lambda and Alexa. It’s pretty much a piece of boilerplate code.
  4. TarotSpeechlet.java the Speechlet is a simple interface that defines the Alexa behaviour: this implements the SpeechletV2 interface which is the main provider of the Alexa behaviours. In this case, it receives an intent and provides a response.
  5. log.properties this file defines the logging for the lambda function.

Code structure

As stated above, there are two Java classes. As the link between Alexa and the application code,  TarotSpeechletRequestStreamHandler is fairly straightforward. It contains a static initializer which copies the APP_ID environment variable to a supportedApplicationIds variable, which can then be passed through the constructor to the superclass.

public class TarotSpeechletRequestStreamHandler extends SpeechletRequestStreamHandler {

private static final Set<String> supportedApplicationIds = new HashSet<String>();

static {
String appId = System.getenv("APP_ID");
supportedApplicationIds.add(appId);
}

public TarotSpeechletRequestStreamHandler() {
super(new TarotSpeechlet(), supportedApplicationIds);
}
}

Obviously, it would be possible to have the APP_ID hardcoded here, but this saves a little messing around. The reason for checking the application ID is to ensure that the request has come from our Alexa skill. It would be possible for someone who knew our endpoints to try sending requests, using our code to do the hard work for them (and be billed for it). Every request for Alexa includes an application ID, that can then be checked.

The Alexa code, the interesting bit, is contained within the TarotSpeechlet. This particular class is extremely simple, but it demonstrates the basic behaviour of Alexa. There are four overridden methods from the interface which are described in the javadoc:

  • onLaunch is “Entry point for Speechlets for handling a speech initiated request to start the skill without providing an Intent”. We’re ignoring this functionality.
  • onSessionStarted, onSessionEnded are two callbacks for when a session begins or ends. Sessions are outside the scope of this particular post, but I’ll write about them later. This allows the creation of skills that include a series of interactions.
  • onIntent is called when a speech request linked to an intent is sent. Here we check for a single intent and if that is not found then an appropriate response is made.

The onIntent method is relatively simple:

@Override
public SpeechletResponse onIntent(SpeechletRequestEnvelope<IntentRequest> requestEnvelope) {
  Intent intent = requestEnvelope.getRequest().getIntent();
  String intentName = (intent != null) ? intent.getName() : null;
  if ("SingleCardIntent".equals(intentName)) {
    return getSingleCardResponse();
  } else {
    return getUnknownCommandResponse();
  }
}

Note that the response is created as a SimpleCard – this is used in the Alexa app to add contextual information to the speech. I’ve also stripped all of the logging to make it simpler.

Putting the application live

At this point, we have all the code that we need to put this application live. There is still a little bit of work required to get the new skill connected to Alexa. I’m not going to outline all of the steps in detail, but will list the basic steps as at the time of writing (late June 2017). I’m also going to assume that an AWS account is available. AWS Lambda is available on the free tier.

The first step is to produce a ‘fat jar’ locally. This is jar file that contains all of the projects dependencies. The build.gradle file contains a jar target that builds this far jar.

gradle build

The resulting file, ./build/libs/alexa-tarot-skill-fat-1.0.jar, is 9.4MB.

The basic steps for the upload are described on Amazon’s page, Deploying a Sample Custom Skill to AWS Lambda. There are three stages to this process:

Creating the Lambda function

Log into AWS lambda, and create a new lambda function. Currently, this needs to be in one of two specific regions, US East or EU. The first option is to select a blueprint. Use a blank function.

The second stage is to create the appropriate trigger. From the list available, select “Alexa Skills Kit”. To generate the list, click on the dotted-rectangle to the left of the Lambda logo.

The bulk of the configuration is contained in the next screen, Configure function.

The required options are as follows:

  • Name and description are set as needed
  • The runtime drop down is changed to ‘Java 8’, which updates the options below in the form.
  • The Upload button is used to upload the far jar from earlier to AWS
  • No environment variables are set at this point. We do not have the APP_ID that will be provided by Alexa, so the skill will not work properly yet.
  • The handler is the packaged classname for the SpeechletRequestStreamHandler. In this case, it will be com.riddlefox.tarot.TarotSpeechletRequestStreamHandler
  • The role needs to be set. If there is no existing role for the account, the drop-down opens a new page in the browser to set up a new role.
  • The Tags and Advanced Settings can be ignored.

Pressing next results in a summary page, and the Create Function button can be pressed to complete the work. This takes a little time to work. Once it is complete, look at the settings for the function to find the ARN. This will be needed in the next stage.

Linking Alexa to the Lambda function

The next task is to create an Alexa skill that connects to the newly-created Lambda function. This requires an account on the Alexa developer portal.  Log in to this and select the Alexa Skills Kit option. This has a button, Add a new skill. Press this to begin the process. The resulting form looks quite complicated, but not all of the tabs need to be filled in.

Skill Information

  • If necessary, change the language from English (US) to English (UK) as this can improve the information received from Alexa.
  • The name should be filled in as needed
  • Invocation name is the name that needs to be spoken to contact the skill.
  • Press Save

Interaction Model

This section defines the way in which Alexa interacts with the Lambda skill. It requires us to copy the information from the resource files. The intent schema requires the content of the IntentSchema.json file:

Further down the page we need to provide our sample utterances. These are in the SampleUtterances.txt file:

Press the save button to make sure everything is as expected, then press next.

Configuration

This tab defines the link to AWS Lambda.  Set the service endpoint type to be AWS, pick the region and add the ARN in the (untitled) text box:

Press save and next.

At this point, the application ID will be available. This is a long string that begins “amzn1.ask.skill”. This now needs to be copied across to the environment variables for the lambda function.

Adding the app ID to the lambda function

Returning to AWS lambda, open the configuration for the function that has been created. Add a new environment variable, called APP_ID, which contains the application ID from earlier. Save this, and the Alexa skill has been set up.

Demonstrating the Skill

Having set up the skill, how do we confirm that it works? Go back to the Alexa developer page and open the Skill in question. On the Test tab, there is a ‘Service Simulator’ section. Entering an utterance here and pressing the Ask Tarot Demo button lets us see the request and response:

The final stage is to test it on the Alexa device. Because this skill is still at the developer stage, it can only be tested on Alexa devices connected to the developer account. Saying “Alexa, ask Tarot,  give me a card” will result in Alexa saying the name of a card.

 If you do not have a physical Alexa-enabled device, it is also possible to test Alexa through a web browser at echosim.io. Note that this still requires a valid Amazon account.

Summary

This post has shown how to set up a very simple application in Alexa. There’s not much more to it, other than demonstrating the set-up, but future posts will focus on how to get Alexa to do more interesting things.

If you have any questions, or anything is not clear, then please leave a comment and I will update the text.

Categories
brightonjava

A Day in the life of a Functional Programmer

I sometimes think I should have used a different name to Brighton Java. Maybe Brighton JVM would have been more appropriate. We’ve certainly had a wider range of talks than the name implies. But the name Brighton Java does seem to draw people in, and nobody complains about the eclectic selection of talks.

IMG_20170531_202936

Last Wednesday we welcomed back Richard Dallaway of Underscore Consulting, who spoke about a day in the life of a functional programmer (slides here, with notes here) The talk was intended to communicate some of the exciting concepts available in Scala

You don’t come away from a talk like this knowing how to work with Scala – but it gives a clear demonstration that there are other ways in which code can work. While Java has certainly added many features in recent years, the language is a far less interesting and expressive one than Scala. It’s also interesting to see the way Scala supports different approaches to a same problem – Java, by comparison, tends to be more prescriptive about how to write code.

For Richard, Scala works better for modelling some things better than Java’s class hierarchies – the talk worked as a good companion to Danielle’s talk the month before.

We’re hoping to start a Scala workshop as part of Brighton Java, based on Functional Brighton‘s Learn You a Haskell group. It looks like we will base the first sessions on Underscores Essential Scala book. More news on that soon.

It was a good meeting, sponsored by Brandwatch. As well as providing the venue and AV equipment, they supported us with a great abundance of pizza. Thank you!

IMG_20170531_193004IMG_20170531_183443

Categories
alexa

Getting Alexa working on the Raspberry Pi

640

I wasn’t that interested in the Amazon Alexa until I saw its product-placement appearance in Mr Robot. Grace Gummer’s character, Dominique DiPierro. lies in bed, unable to sleep, talking to the device.

It’s an odd scene, and the character’s isolation is probably not the best advert for a new piece of technology. The thing that fascinated me was the potential for empathy in the voice interface. DiPerro took some comfort from the machine. This might be a kinder interface than the command line (which a voice interface is, ultimately). This is possibly a strange place to start looking at a new piece of technology, but there you go.

The main reason I’d not looked at Alexa sooner was a disappointment with the command-line bots I’ve seen over the years. Most of them seemed stilted and artificial. Rather than being a natural interaction, I’d be fighting a parser, like I was playing an 80’s era text adventure. I assumed Alexa would be more of the same. Mr Robot suggested other possibilities. Voice is a natural interface – it’s one we use in daily life. We speak to people when we’re with them rather than turning to writing notes as being efficient.

The echo Dot is about £44.99, but I had a Raspberry Pi at home to experiment with. This also offers the possibility of changing the wake word, rather than choosing between ‘Alexa’, ‘Echo’, ‘Amazon’ or ‘Computer’. The Alexa on raspberry pi tutorial contains most of the information needed. I’m not going to write a tutorial for a tutorial, but I wanted to note a few things:

  1. The tutorial lists monitor, mouse and keyboard as pre-requisites, but these aren’t needed if you SSH into the Pi. This worked perfectly as long as I remembered to plug the Pi into the router before turning it on. It even set itself up on the network with a namer of raspberrypi.lan – which was very helpful, as I’m not that great at configuring networks.
  2. As Jez Nicholson pointed out to me, this is a “slightly hostile ‘frontier land’ coding environment”. The java client spits out stack traces to the command line in a way that’s a little surprising from a major company. And my first attempts to set up the Pi were frustrated by an unhelpful error when authenticating the device on the Amazon site – no indication what it was, just the assurance that “we’re already working on the problem”.
  3. I eventually found out what the issue was after googling the issue. It turned out I’d not copied my DeviceID exactly. If you’re writing an API, you have to give as much feedback as possible to the user. APIs really should return detailed errors or trigger an automated ticket creation (rather than claim you’re working on the problem). You could even email me when it is fixed.
  4. The default setup for kitt-ai meant that the wake word detection was far less sensitive than Alexa herself. It was a little difficult to get the device to acknowledge my repeated calls of its name, like I had a poorly-trained dog in the flat. I’m not sure what the neghbours make of my increasingly loud calls of “Alexa”.
  5. Alexa was happy to give me the weather – in Washington State. When asked “where am I”, it insisted I was in Seattle. I guess there are some settings need altering somewhere.
  6. One thing that feels like its missing on voice interfaces (or, at least, this implementation) is a return key. There was a short pause after I finished speaking. When speaking to humans we can usually figure out when one of us is done talking. Also, the need to get information from servers prevents a flowing interaction between us.

Now I’ve got this working, which means I too can ask Alexa when the world will end. I now need to set up a simple Amazon skill. Which looks like it could be as much fun as setting up Alexa was in the first place.

Categories
brightonjava

Speaking at Brighton Java on January 25th

I’m speaking at Brighton Java next week on How to Deploy Java Webapps the Hard Way. It’s currently fully booked, but it’s worth trying the waitlist. The talk looks at some of the issues I’ve written about on this blog, such as the complexities of even simple Java projects. I’ll also consider technical debt and how to cope when problems arise.

Java Web Development the Hard Way

Tools like Spring Boot now mean that you can produce a working service from a tweet’s worth of code. But too often rushing headlong into production can lead to problems later.

James Burt looks at the work needed to get a supportable Java service into production. Too often, in the hurry to release features, companies pile on technical debt until their code becomes unmanageable. How do you avoid getting into these situations? And what do you do if it’s already happened?

This talk will start with a simple Spring Boot service and look at the tools and techniques that should be added before going live, making a case for a slower, more sustainable pace of development. 

Categories
springboot

The complexity of a simple Java project

I recently built a small prototype using Spring Boot. It wasn’t much of a site, just two forms and two reports. As it was only being demonstrated locally, there was no need to worry about deployment and hosting. What’s fascinating is how many different technologies were used in such a simple piece of development:

  • Java 8
  • Git
  • Gradle
  • Spring Boot
  • Spring Security
  • Spring Data
  • Flyway
  • JPA
  • MySQL
  • HTML
  • Thymeleaf
  • Angular
  • CSS
  • Bootstrap
  • REST
  • Webjars
  • JUnit
  • Mockito
  • Jacoco

Obviously, it’s great how easy it is to use so many different technologies together: building software and handling dependencies through gradle is much easier than doing it by hand; using Spring Data to handle persistence saves a huge amount of time and configuration.

Having said that, a full-stack demo in Java has involved a huge number of technologies – 19 in total. Not all of these require competency (and in some, like Angular, I’d like to know a lot more).  Some, like flyway or jacoco could be ignored – although I’d rather have them in place early than add them later.

When I first leaned Java it was relatively straightforward. My first job required Java, HTML, CVS, make, JSP, JDBC and MySQL. I wouldn’t want to return to that era – the applications I produce now are far more sophisticated than anything we could have done back in 2000. But I do wonder how easy it is for new developers to gain confidence and competence in so many tools. Consider how much harder it would be to get a simple site up-and-running in Java compared with PHP.

Which poses an interesting question – how does a new developer get to the point where he or she can produce something interesting? And how can we know that we are using each of these 19 technologies competently and securely?

Categories
brightonjava

Brighton Java Coding Dojo

Coding Dojos are a way for developers to practise together and improve their skills. I first became aware of them through the sessions run by Tom and Joh at Future Platforms. Since then, I’ve run lunchtime sessions at Crunch and now we’re running them as part of Brighton Java.

What happens at a Coding Dojo

The coding dojo begins with a description of a problem. Developers then take turns pair-programming for five minutes each, with one as the driver (using the  keyboard) and the other as navigator (making suggestions). After five minutes, the navigator takes over as the driver and there is a new navigator. As the pairs work, they narrate what they are doing. The IDE screen is also projected so that everyone in the room can see it clearly.

Seeing other people code is good for picking up the different ways people work. As developers we see a lot of people’s code, but few companies offer a chance to see it being written. By changing the people working on the dojo code, we see how developers respond to existing code.

Coding Dojos typically feature the use of TDD. Test-driven development is one of those things that a lot of companies endorse, but few use properly. Trying to maintain a tight test-code-refactor cycle is much easier with an audience to act as a conscience!

At the end of the session, everyone takes a turn saying what went well, what went badly, and anything they’ve learned.

Why would I want to attend a Coding Dojo?

Whatever your exact job within programming, it’s vital to be comfortable with basic development. The structure of a coding dojo, with its focus on deliberate practise and review makes a good environment for learning. This is important for new Java developers, but there are also valuable insights for advanced developers – not least, practise at collaborating with people at different levels.

I’ve definitely gain from the two recent sessions, which have provoked interesting discussions on when to refactor, the place of design in TDD/agile and error checking in functions. None of these are advanced issues, but I reckon they are all vital for day-to-day work.

Another reason for attending is that the sessions are fun. You get to meet other developers and work with them. Collaborating with people from outside our own companies is a great way to learn new things.

Categories
continuousdelivery

Spring Bootstrap (and AngularJS!)

Over the past few weeks I’ve been working on my simple Java application, which I’m planning to put into a github archive as the basis for Java prototyping. The last thing needed  before doing this is to tidy up the front end.

I’m not a particularly experienced front-end developer – it’s a skill I’ve neglected over the years. But it’s hard to excuse not making some effort. A lot of people find it easier to appreciate a prototype when it looks a little polished.

In this post I’m going to summarise basic steps to add Bootstrap and AngularJS to a project (it’s not intended as a step-by-step tutorial!). Adding Angular is particularly useful as it allows the back-end to be sensibly separated from the front end. I’ve worked at too many places where a templated front-end became tightly coupled to the back-end. A REST server accessed via a Javascript framework like Angular is much more sensible. It forces the back-end to remain independent, with a clear, well-communicated API.

REST endpoints

Converting a Spring endpoint to use REST is ridiculously easy. I had a simple Spring Data repository that returned a list of RSS entries. The controller class was annotated with the @RestController annotation. Then there was a method returning a list of Entry objects:

@RequestMapping("/rest")
@CrossOrigin
public List<Entry> rest() {
  List<Entry> entries = new ArrayList<Entry>();
    if(entryRepository!=null) {
      entries = entryRepository.findAll();
    }
  return entries;
}

The CrossOrigin annotation was there to allow me to access the endpoint from a local copy of the HTML page. This meant I could test changes to the static content without redeploying the Spring application.

Bootstrap

Bootstrap is a front-end framework, designed to make it easier to produce decent looking UIs. Even at its most basic level, it avoids an HTML page looking like the dreary browser defaults. All that is needed it to adapt one of the basic templates.

AngularJS

I’m less confident about my AngularJS use than any other part of this project. It works, but I can’t guarantee that I’m using Angular in the most sensible or efficient way.

There are two files involved, a Javascript page and some changes to the HTML page. The relevant section of the HTML page is straightforward:

 <div ng-controller="Rss">
 <table>
 <tr>
 <th>Title</th>
 <th>Link</th>
 </tr>
 <tr ng-repeat="entry in entries">
 <td>Title: {{entry.title}}</td>
 <td>{{entry.link}}</td>
 </tr>
 </table>
 </div>

The Javascript file contains the following method:

function Rss($scope, $http) {
  $http.get('http://localhost:8080/rest').
  success(function(data) {
  $scope.entries = data;
 });
}

Conclusion

While the front-end described here is not sophisticated, it improves signficantly upon the default UI provided by a browser. It also separates the UI clearly from a REST API for the backend, allowing the two to be worked on independently.

Categories
continuousdelivery

A quick note on Spring Integration

Another thing I’ve played with recently is Spring Integration, adding an RSS reader to the example I’m working with. There are a lot of examples of Spring Integration about the place, but there weren’t any doing exactly what I wanted – the clearest examples tended to rely on XML rather than annotations.

(An interesting discussion on a recent Java Council podcast discussed how common it was to find obsolete answers voted up on Stack Overflow. It’s easy to find answers to technical questions these days, but sometimes it’s harder to find the most up-to-date answer).

Anyway, I put together a working, if clunky, RSS reader, and thought I would make a quick summary of the changes it required.

build.gradle

Some new dependencies were needed in build.gradle:

 compile("org.springframework.boot:spring-boot-starter-integration")
compile("org.springframework.integration:spring-integration-feed")
 compile 'com.rometools:rome:1.6.0'

resources/feed-bean.xml

For the sake of expediency, I succumbed to a little XML. With a little more time, I could transalte this into the newer annotation format:

<?xml version="1.0" encoding="UTF-8"?>
<beans xmlns="http://www.springframework.org/schema/beans"
 xmlns:xsi="http://www.w3.org/2001/XMLSchema-instance" xmlns:int="http://www.springframework.org/schema/integration"
 xmlns:feed="http://www.springframework.org/schema/integration/feed"
 xsi:schemaLocation="http://www.springframework.org/schema/beans
http://www.springframework.org/schema/beans/spring-beans-3.0.xsd
http://www.springframework.org/schema/integration
http://www.springframework.org/schema/integration/spring-integration.xsd
http://www.springframework.org/schema/integration/feed
http://www.springframework.org/schema/integration/feed/spring-integration-feed.xsd">
 
 <int:channel id="feedChannel">
 <int:queue />
 </int:channel>
 
 <feed:inbound-channel-adapter id="feedAdapter"
 channel="feedChannel" url="http://feeds.bbci.co.uk/news/rss.xml?edition=uk">
 <int:poller fixed-rate="30000" max-messages-per-poll="100" />
 </feed:inbound-channel-adapter>
 
</beans>

Controller Java class

I added a new method to my existing controller (which is turning into a little of a catch-all class – I’ll be a little more tidy when I come to do this as part of my Java infrastructure write-up)

@PostConstruct
public void setUpRssReader() {
  ApplicationContext context = new ClassPathXmlApplicationContext( "/feed-bean.xml");
 
  // create a pollable channel
  PollableChannel feedChannel = context.getBean("feedChannel", PollableChannel.class);
 
  for (int i = 0; i < 10; i++) {
  // receive the message feed
     Message<SyndEntry> message = (Message<SyndEntry>) feedChannel.receive(1000);
     if (message != null) {
       SyndEntry entry = message.getPayload();
       log.info(entry.getPublishedDate() + " - " + entry.getTitle());
       Entry myEntry = new Entry(entry.getTitle(), entry.getLink());
       entryRepository.save(myEntry);
     } else {
       try {
         Thread.sleep(10000);
       } catch (Throwable t) {
         // ignore
     }
   }
  }
 }

It’s not a particularly sophisticated example, but it illustrates how easy it is to set up simple integrations in Spring. I’m now going to proceed to set up a decent front end – once that is done, I can put it all together to make a very simple Java prototype.